
This is the Part 2 of this tutorial, let's continue to step 8. If you missed the Part 1, just click here.
8. Browse and open the desired bitmap.
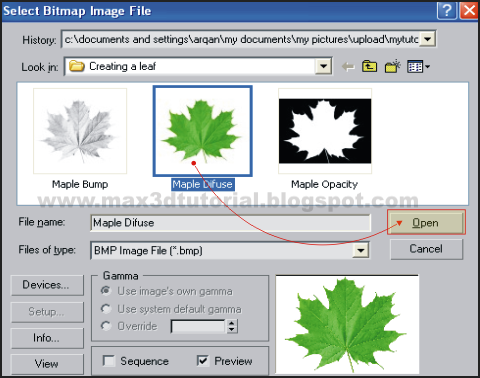
Fig.08
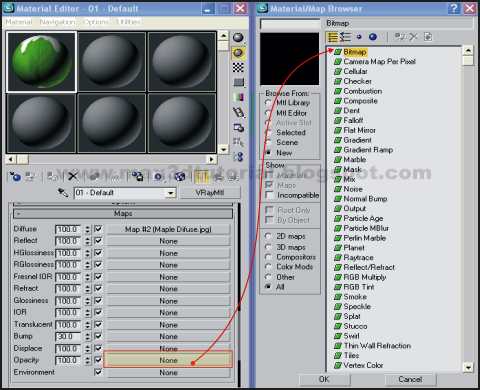
9.Still in ‘Material Editor’, scroll down and expand the ‘Maps’ roll out, click the ‘Opacity’ button and select ‘Bitmap’.
Fig.09
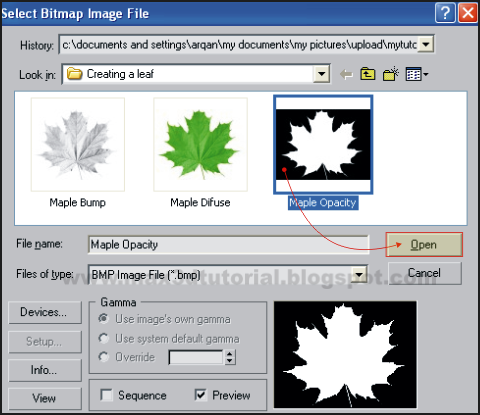
10. Browse and Open the desired ‘Opacity Bitmap’.
Fig.10.
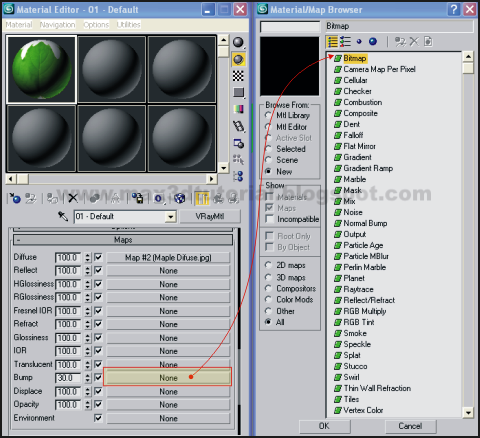
11. Do the same step to insert a bitmap for ‘Bump’.
Fig.11
12. Now we are ready for the ‘Material’, go to perspective view, select the plane and assign the material to the plane. Check the ‘Show Map in Viewport’ button.
Fig.12
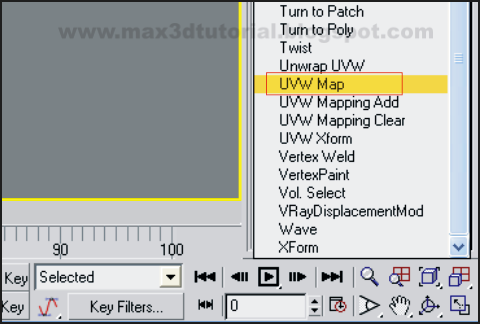
13. Still on ‘Perspective’ view, select the plane and click the ‘Modify’ tab. In a ‘Modifier List’, scroll down and select ‘UVW Map’ modifier.
Fig.13
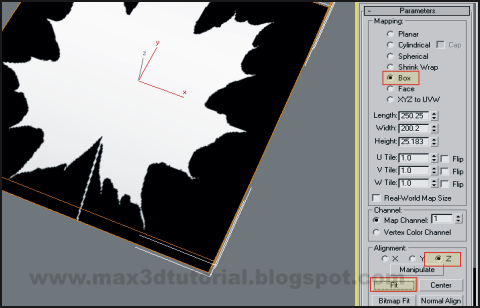
14. Set the ‘UVW Map’ parameters. Turn ‘Mapping’ into ‘Box’, and change the ‘Alignment’ in to ‘Z’, then click the ‘Fit’ button 1 time.
Fig. 14
15. Go to perspective view, and hit render. For the default Vray render setting, the result is below in Fig.15
Fig. 15
16. For more realistic result, you have to add a light and set up the render setting. Here the result below in Fig.16.
Fig.16
17. Well...that's the end of this tutorial, just write a comment below if you have any question. Thanks, enjoy your day :)






de wsws
ReplyDelete